Home > Using SnapStream: the Web Interface > Admin > Settings > Workflows
  New Workflow trigger for "hours after recording is finished"

The Workflows feature allow you to create custom post-processing rules for recordings.

clip0347

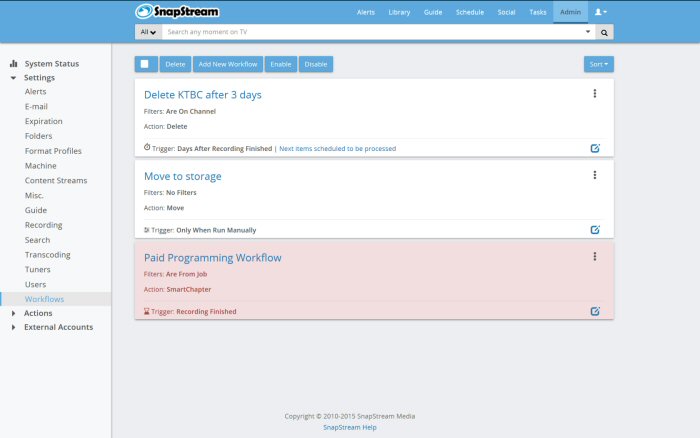
Workflows can be sorted by Name or by the type of Trigger that they use (see below for an explanation of Triggers).

To stop a Workflow from running temporarily, click the checkbox and then Disable. Disabled Workflows will be highlighted in pink, as shown above. Use the Enable button to reactivate a disabled workflow.

To export a list of all of the existing Workflows with their properties, press F2.

To see the properties of a Workflow, click Details.

To see a list of the next 20  files that will be affected by a Workflow, click Next items scheduled to be processed. (Note: this option will only appear for Workflows using a Days After trigger. See below)

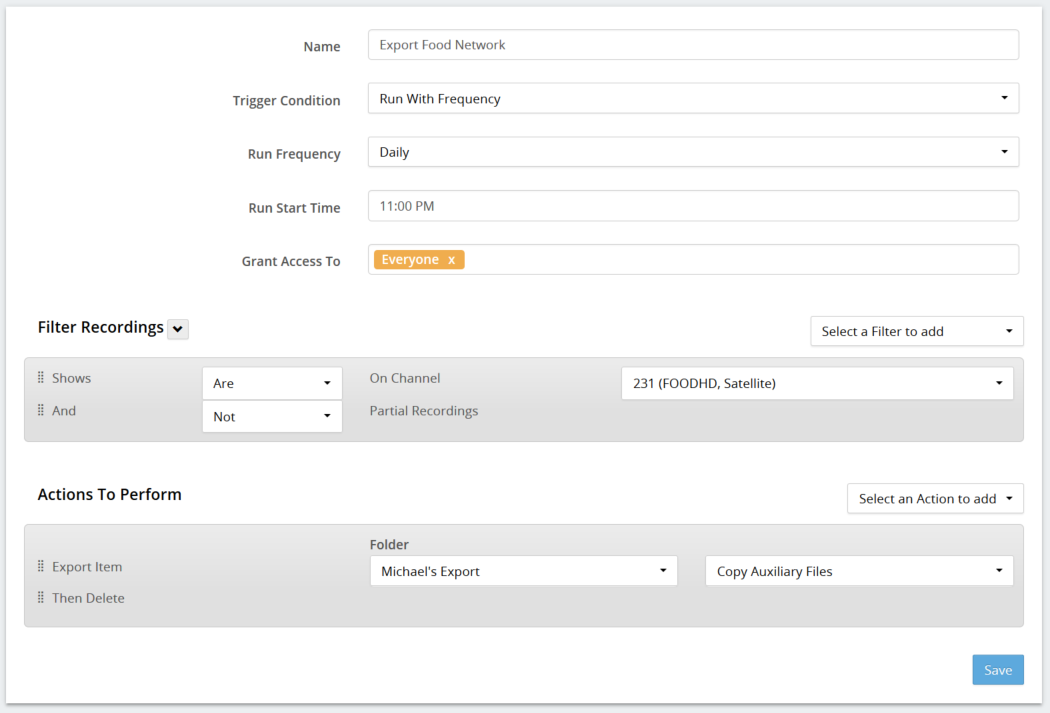
An example of a Workflow is below:


Trigger Condition

The first part of the Workflow is the Trigger Condition. This part allows you to select an event that will cause the Workflow to be applied.


In this case, the Workflow will be applied when a recording finishes.

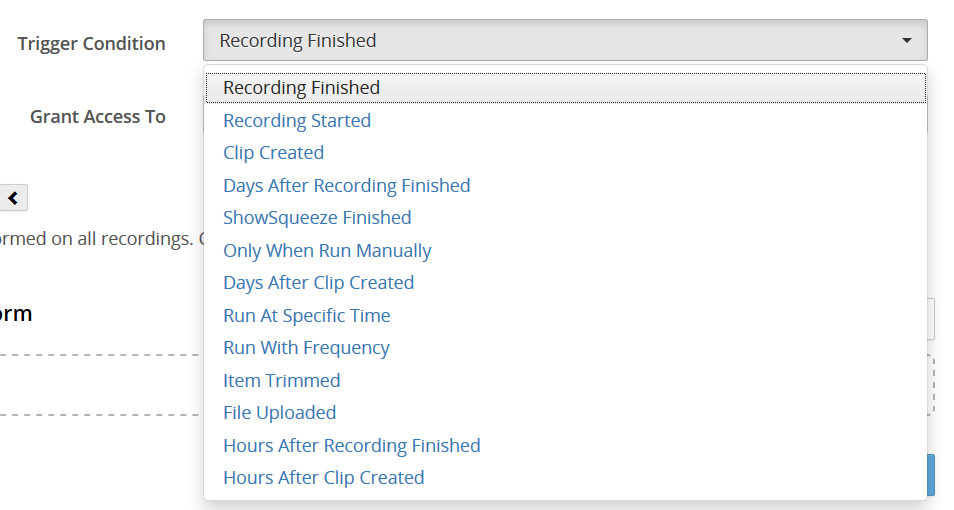
The triggers that are available are:

Recording Finished
Recording Started (Note: not all Actions are available with this trigger.)
Clip Created
Days After Recording Finished (Note: For ShowSqueezed or clipped files, this trigger applies to the date of the original recording from which the file was created, not the date on which the ShowSqueezed or clipped file itself was created)
ShowSqueeze Finished
Only When Run Manually (this option prevents the Workflow from being run unless it is submitted manually through the Library)
Days After Clip Created
Run At Specific Time
Run With Frequency (includes option to run at a set time of day once per day, once per week, or once every two, three or four weeks)
Item Trimmed
File Uploaded
 Hours After Recording Finished
 Hours After Clip Created

When an event occurs that triggers the Workflow, the Workflow will be applied to the file that satisfied the trigger condition.

Only one trigger can be selected for each Workflow.  However, any Workflow can also be run on selected recordings at will through the Library, or on selected Search results.

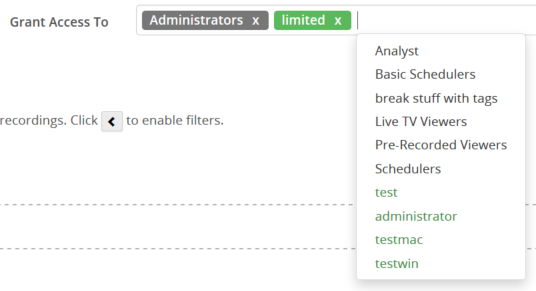
The Grant Access to option can be used to restrict the use of Workflows on these pages. 

Click the text box to see a list of the groups and users that can be granted access to the Workflow:


Groups are listed in grey, while users are listed in green. "Everyone" is listed in orange.


Filters

The second part of the Workflow is the Filter. This defines the range of recordings to which the Workflow will be applied.


Each time the Trigger Condition is satisfied, the file that satisfied the trigger will be checked against the filters.

In this case, only recordings that are not HD will pass the filter.

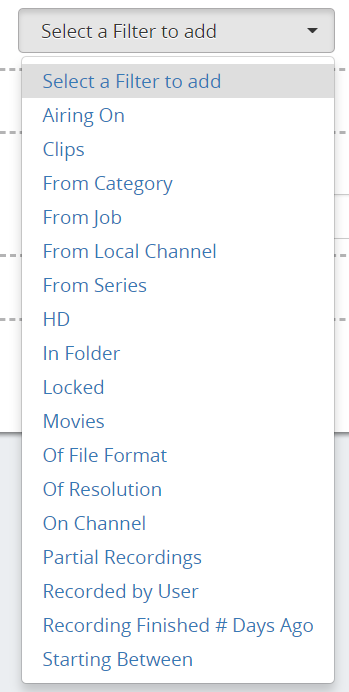
The filters that are available are:

  • Airing on: Filter by day of week
  • Are or are not Clips
  • From Category
  • From Job (i.e. the recording job that originated a full-length show)
  • From Local Channel (i.e. the network affiliates for any given area)
  • From Series
  • Are or are not HD
  • In Folder
  • Are or are not Locked
  • Are or are not Movies
  • Of File Format
  • Of Resolution
  • On Channel
  • Are or are not Partial Recordings (i.e. recordings that were interrupted)
  • Recorded by User (i.e. the user that scheduled the original recording job)
  • Recording finished # of days ago
  • Starting between: Filter by time of day


To add an item to the filter, drag and drop it to the gray Filters box.

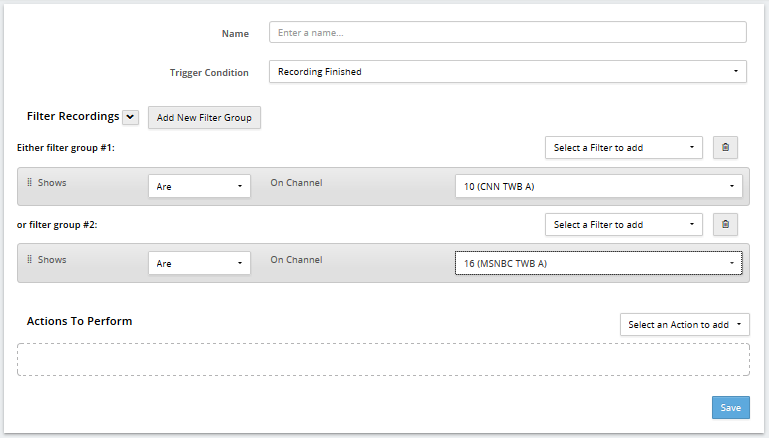
To include items with different properties, such as items from both CNN and MSNBC, use the Add New Filter Group option. 


Using filter groups allows you to apply a single Workflow to items with distinct properties. 


Actions to Perform

The third part of the Workflow is the Actions to Perform. This part defines the steps that will be taken for recordings that pass the filter.

In this case, recordings that pass the filter will be transcoded to Windows Media and then transcoded to H.264.


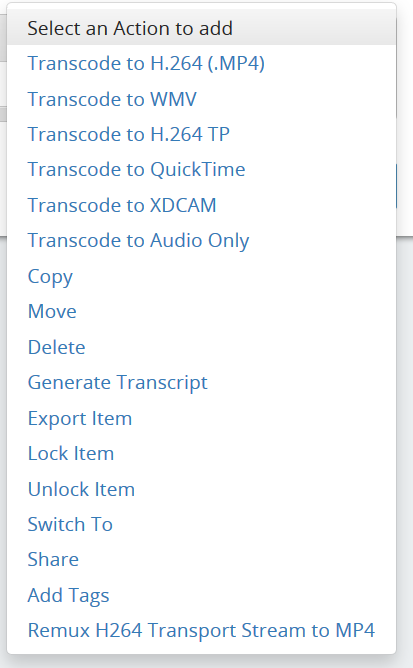
The actions that are available are:

Transcode to H.264
Transcode to WMV
Transcode to H.264 TP
Transcode to QuickTime
Transcode to XDCAM
Transcode to Audio Only
Copy
Move
Delete
Generate Transcript- This action will save a transcript of the closed-captioning data from this recording to the folder of your choice, or email the transcript to the address(es) of your choice.
Export Item- This action includes options to Copy Auxiliary Files (including captions and SmartChapter files), Create a Metadata XML file along with the exported file, or Remove Metadata from the exported file.
Lock Item
Unlock Item
Switch To- This option allows workflows to be "chained," so that actions can be performed on the files generated by a previous action. See About Target Switching for more information.
Share
  Add Tags
  Remux H.264 Transport Stream to MP4- Changes the file container for H.264 recordings from Transport Stream to MP4. This will also change the file extension to .mp4.

Actions that are performed by a Workflow will show up on the Tasks page.


See also
Alerts
E-mail
Expiration
Folders
Format Profiles
Machine
Misc
Guide
Recording
RTMP
Search
Transcoding
Tuners