Ability to switch Public playlists back to Private
Playlists allow sequential playback of two or more recordings.
Add Recordings to a Playlist
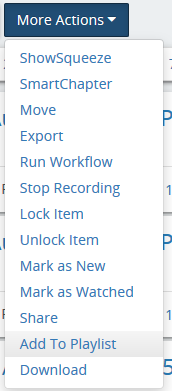
Use the checkboxes to select recordings from the Library. Then select Add to Playlist from the More Actions drop-down.
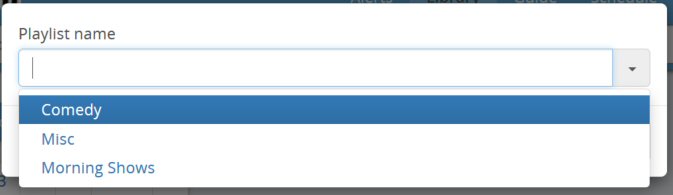
You will be prompted to add the selected recordings to an playlist. Click the arrow to open a list of existing playlists, or simply start typing to enter a new playlist name.
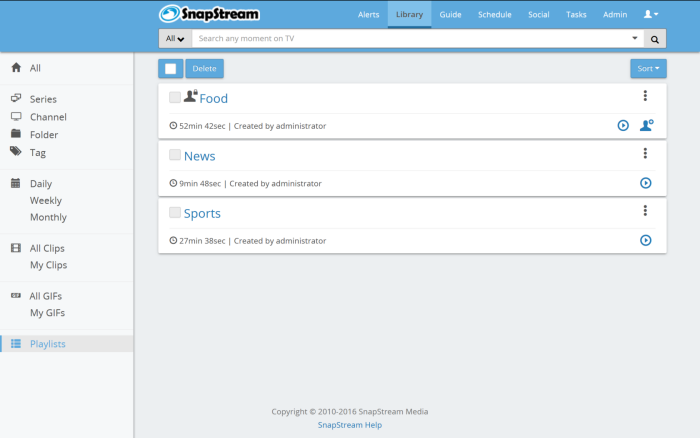
View Playlists
Click Playlists in the Library.
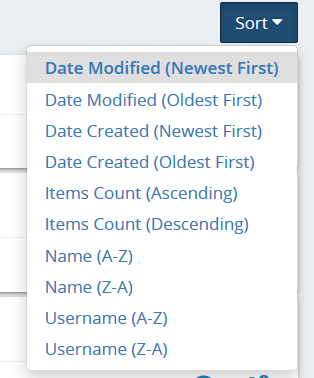
By default, Playlists are listed in order of date created, with the newest lists appearing first.
Playlists can also be sorted by the date the playlist was updated, the number of items in the list, the name of the playlist, or the name of the user that created them.
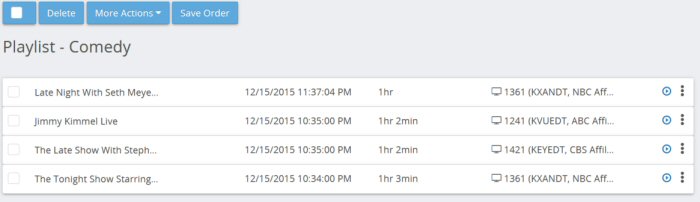
To see a list of the programs in a playlist, click Details.
Playback
To start playback, click Play, or the title of the playlist. Playback will start in the Web Player.
Playback controls are the same as in the Web Player normally, with the addition of theNext Item In Playlist () and Previous Item In Playlist () buttons. You can also skip forward and backward in the playlist by hitting Shift+Right Arrow and Shift+Left Arrow, respectively.
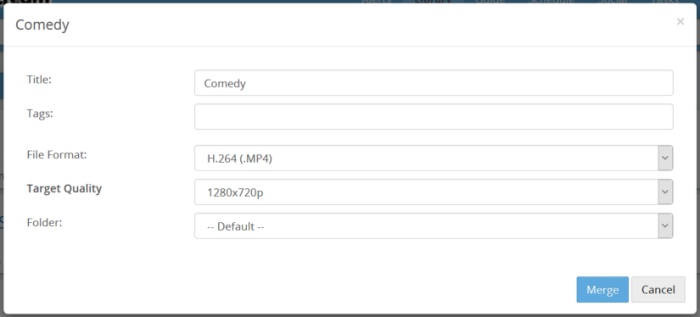
To combine the items in a playlist into a single transcoded file, click Merge.
Select a Title for the merged clips, enter any Tags, and select a File Format, Target Quality and Folder. Then click Merge. You will be able to track the progress of the merge operation on the Tasks page.
Edit a Playlist
Click Edit.
Using the checkboxes, you can select recordings in order to take action on them. To Select All of the recordings on the current page of the library, use the checkbox at the top of the page
To remove an item from the playlist, select it and click Delete. Click Details to see the Recording Details page for the item.
To change the order of the items in the list, click and drag the items on the page. You will see this message:
Click Save.
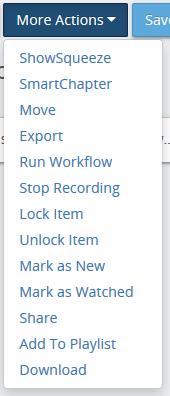
The options in the drop-down marked More Actions also affect Checked recordings:
•
ShowSqueeze: Submits all checked recordings for transcoding in a batch. See ShowSqueeze Selected Shows for more information on this option.
•
SmartChapter: Submits all checked recordings for SmartChapter generation. See SmartChapter Selected Shows for more information on this option.
•
Move: Moves all checked recordings to a video folder of your choice. Note: Enterprise TV cannot move recordings to a location that has not been added as a video folder.
•
Export: Copies all checked recordings to the Export Folder of your choice. See Export Selected Shows for more information on this option. See Folder Manager for more information on Export Folders.
•
Run Workflow: Executes the Workflow of your choice on the checked recordings. See Workflows for more information.
•
Stop Recording: Stop an in-progress recording. Selecting this option for a completed recording will have no effect.
•
Keep Until I Delete: Marks shows as "Keep until I delete," ensuring that the show will not be automatically deleted. Shows with this setting will be marked with a lock icon.
•
Keep Until Space Is Needed: Marks shows as "Delete when space is needed," which allows Enterprise TV to delete the recording when running low on space.
•
Mark As Watched/ Mark As New: Marks checked recordings as Watched or New.
Add To Playlist: Adds the item to a playlist. See Playlists for more information.
•
Download: Download selected recordings to disk
Playlist Permissions
If the Default Playlists to Private option is enabled in Miscellaneous Settings, new playlists will be only appear to the user who created them. This is indicated by the icon, as shown here:
To enable other users to see this playlist, click the icon. You will be prompted to confirm:
After you click Yes, the playlists will now be visible to all users.
You can make the playlist private again by clicking the icon.


 icon, as shown here:
 icon. You will be prompted to confirm:

 icon.
icon.